Most Faraday cage guides skip the first and most important question: what are you actually trying to protect? Equipment or people? Electronics or biology? A survivalist protecting comms gear has a fundamentally different shielding problem than someone building a low-EMF bedroom for sleep recovery. These two goals share a name — Faraday cage home EMP protection — but they require completely different strategies, different materials, and different success criteria. This guide clearly separates them, walks through every scale from a $40 metal box to a $12,000 shielded room, and gives you a decision framework to stop spending money on the wrong tier.
One more thing before we get into specifics: the wellness industry has produced a lot of content on EMF-recovery rooms featuring beautiful linen-wrapped copper mesh and carefully sourced materials. That work has value in its own context. But it does not address EMP hardening. Grounding requirements are different. Attenuation targets are different. And the failure modes — a gap that lets 900 MHz WiFi bleed through — are categorically different from those that allow a 50 kV/m E1 pulse to destroy your backup radio. Those are not the same problem.
EMP Threat vs. EMF Exposure — Clarify the Mission First
A nuclear EMP event produces three distinct pulse phases. E1 is the fastest — nanoseconds — and destroys semiconductor junctions directly. E2 resembles lightning and arrives milliseconds later. E3 is a slow geomagnetic disturbance lasting minutes to hours, similar to a severe solar storm, that collapses transformer infrastructure at the grid level. Consumer electronics die in E1. The grid dies in E3. Your Faraday cage is only useful against E1 and E2 — and only if the devices are inside it during the pulse and disconnected from external wiring.
EMF health exposure is a different category entirely. The concern there is chronic, low-level radio-frequency and extremely low-frequency (ELF) exposure from WiFi routers, smart meters, cell towers, and household wiring — none of which produce anything approaching EMP-grade field strengths. The shielding goal for EMF wellness is to reduce ambient RF to below roughly 0.1 µW/cm² in sleeping areas. The shielding goal for EMP protection is achieving 40–80 dB of attenuation across a broad frequency range up to several GHz.
Here's the part most guides miss: those two attenuation targets can be achieved by similar materials, but the construction standards are not interchangeable. An EMF-grade shielded bedroom with minor seam gaps may still read excellent on a broadband RF meter. Those same gaps — at a door frame, a ventilation duct, or an unsealed outlet — can compromise EMP protection by orders of magnitude under high-field-strength conditions. The physics don't forgive shortcuts the same way in both applications. This isn't opinion — it's fundamental electromagnetic theory. The Faraday effect strength degrades with increasing aperture size relative to the wavelength.
Quick decision framework: If your primary concern is protecting communications gear, spare electronics, and batteries against a grid-collapse event, you need equipment-level or room-level EMP hardening with verified grounding and sealed penetrations. If your primary concern is sleep quality and chronic RF exposure, you need a lower-attenuation EMF room with attention to material breathability and livability. If you want both — and many readers of this site do — build the EMP-grade room to the higher standard, and the EMF benefits come with it for free.
The Faraday Shielding Spectrum — Three Tiers Worth Building
Not every household needs a shielded room. The single most important thing I tell every client is this: a well-built $200 Faraday box protecting your radio, spare phone, backup batteries, and a small laptop will deliver more operational value after an EMP event than a $6,000 shielded bedroom that contains no functional electronics. Start with assets. Scale to spaces only if the budget, timeline, and threat model justify it.
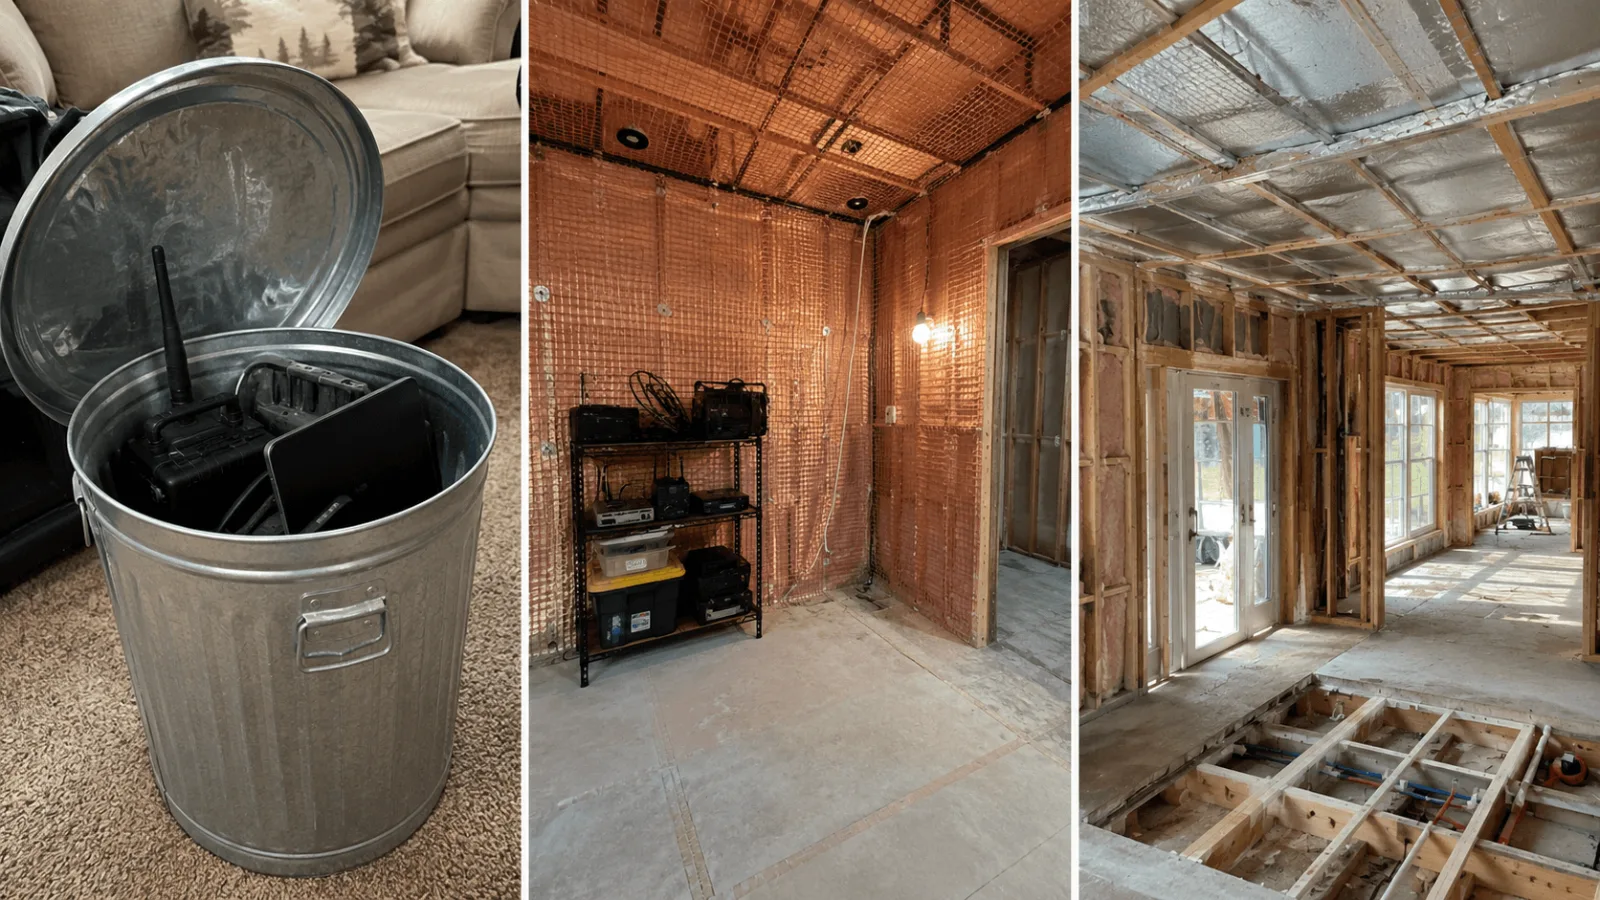
Tier 1 — Equipment-only enclosures ($40–$300): Military surplus ammo cans with gasket seals, galvanized steel trash cans with overlapping lids, or purpose-built Faraday bags rated to 40–80 dB. These protect specific devices — Baofeng or Yaesu handheld radios, a backup smartphone, USB battery banks, a small solar charge controller. Devices must be powered off and disconnected from external cables. At $40 for a quality ammo can and another $20 for copper tape for seam sealing, this tier is immediately accessible. It's also the tier most preppers skip because it feels too simple. It isn't.

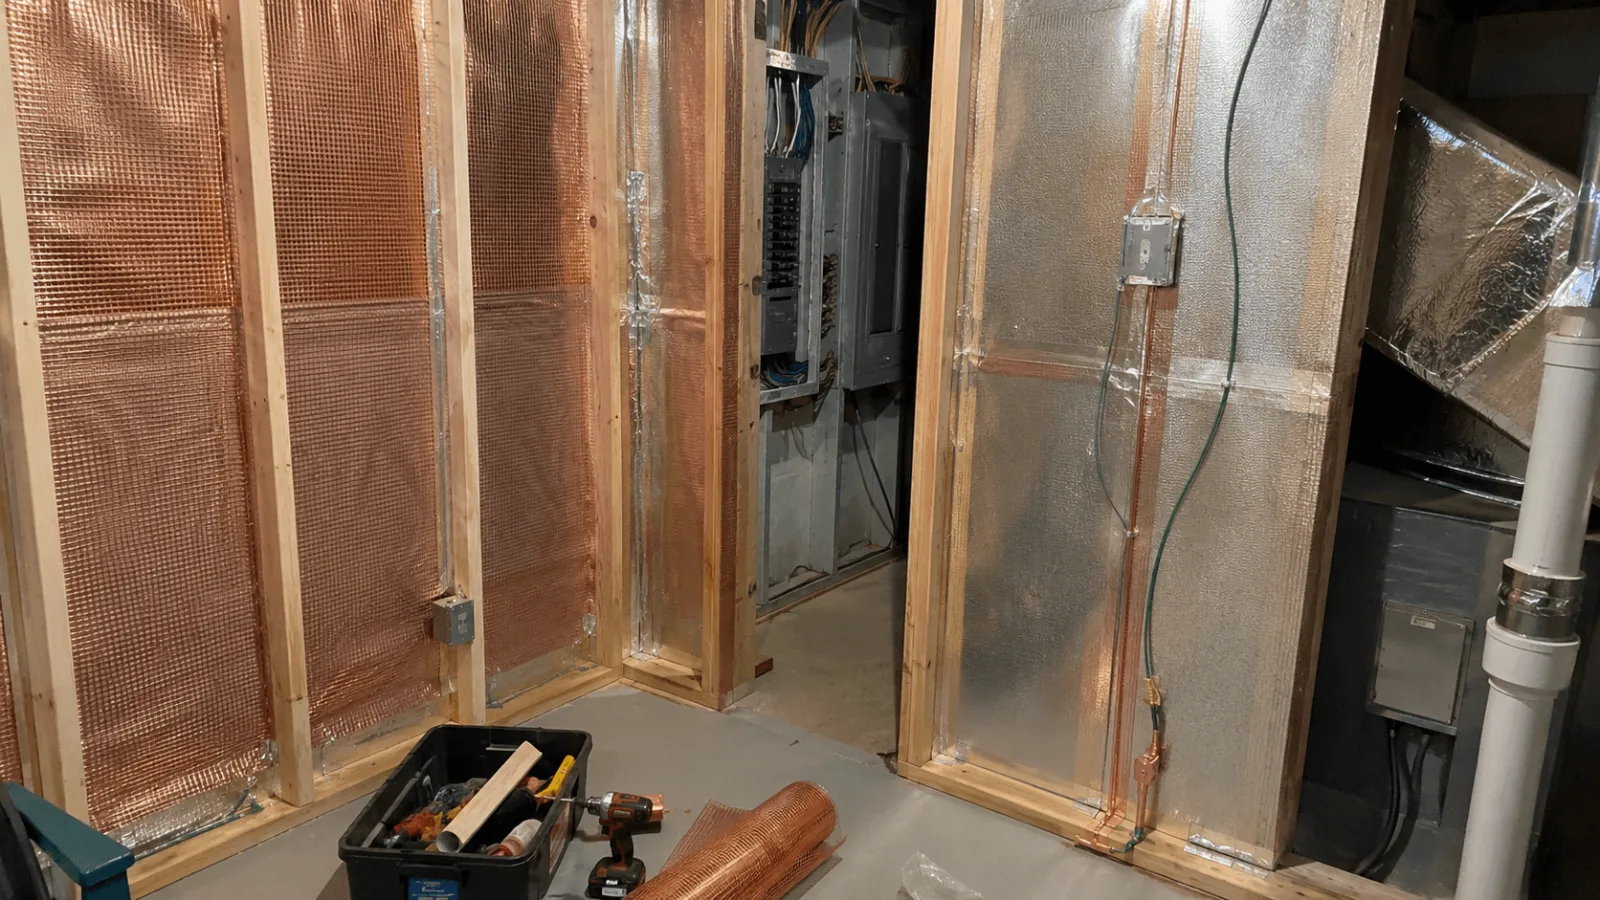
Tier 2 — Single-room shielding ($800–$4,000 DIY; $3,000–$8,000 contractor-installed): A bedroom or dedicated comms/comms closet lined with copper mesh or galvanized steel sheet, grounded to an earth rod, with shielded door seals and treated penetrations. This is the practical ceiling for most households — enough volume to store critical gear, potentially sleep in, and use as a communications operations center post-event. Material costs for a 12×12 room range from $600 to $1,800, depending on mesh grade. Labor and penetration sealing add significantly if outsourced.
Tier 3 — Multi-room or structural shielding ($15,000–$60,000+): Whole-home or purpose-built safe room shielding integrated during construction or major renovation. Reserved for high-threat-model scenarios, critical infrastructure operators, or facilities requiring MIL-STD-461 or NSA 65-6 compliance. Outside the scope of most residential preppers. If you're at this tier, hire a professional RF shielding contractor — not a general contractor who has read about Faraday cages.
Materials, Grounding, and Construction — What Actually Works
Here's what most people get wrong about shielding materials: higher conductivity doesn't automatically mean better EMP performance. Mu-metal excels at low-frequency magnetic shielding but is expensive ($15–$40/sq ft), fragile, and overkill for E1 EMP protection. Copper mesh (typically 40–60 dB attenuation depending on mesh grade) is the practical standard for room-level shielding — expect $3–$8/sq ft for 200-thread fine copper. Aluminum foil provides real attenuation but tears easily, creates continuity problems at seams, and degrades faster than mesh. Galvanized steel sheet at 24-gauge is the budget-performance leader for equipment enclosures — $0.80–$1.50/sq ft — and delivers 60+ dB when properly sealed.
Grounding is non-negotiable. A Faraday enclosure without a proper earth ground is significantly less effective against EMP than one that is correctly bonded. The induced charge from an E1 event needs a low-impedance path to earth — without it, potential builds on the cage surface and can couple into devices inside through capacitive pathways. Install a dedicated copper ground rod (8-foot minimum, per NEC Article 250) within 10 feet of the shielded room, use 4 AWG bare copper bonding wire, and connect it to the cage's outer conductive layer at multiple points. The wellness industry rarely emphasizes this. For EMP preparedness, it's the difference between a working cage and expensive theater.
Common DIY failures I've seen repeatedly: insufficient seam overlap (minimum 2 inches, soldered or copper-taped with conductive adhesive), unshielded electrical penetrations (use shielded conduit or ferrite-filtered outlets inside the cage), and HVAC ductwork that acts as a waveguide directly into the protected space. Every penetration is a potential failure point. Treat them all.
Installation Walkthrough — Building a Single-Room Faraday Space
Pre-build checklist before any material goes on the wall: map every electrical outlet, light fixture, switch, HVAC register, plumbing penetration, and data cable entry. Each one requires a shielding strategy. Outlets inside a shielded room need ferrite-core filtered power strips or shielded outlet boxes. HVAC registers need honeycomb waveguide-below-cutoff panels (available through RF shielding suppliers like Amray or Rampart; expect $80–$150 per register). Windows need copper mesh laminated to glass with conductive frame bonding — or block them entirely for a comms-only room.
Wall installation sequence: apply copper mesh or steel sheet directly to studs (not over drywall — the air gap reduces bond quality), overlap seams by 2 inches minimum, solder or conductive-tape every seam, and then cover with standard drywall if livability matters. Ceiling follows the same process. Floor shielding is the most commonly skipped element — use copper sheet under subfloor materials and bond to wall shielding with continuous perimeter contact. A shielded ceiling and walls with an unshielded floor is a partial cage, not a Faraday cage.
Door seals are the highest-failure-rate element in DIY builds. Use RF-shielded door frames with beryllium copper finger stock gaskets — not foam weatherstripping, which provides zero RF attenuation. Entry doors should use a knife-edge-into-channel seal design. Expect to spend $300–$600 on a properly shielded door assembly. A $15 weatherstripped door frame will functionally ruin an otherwise solid build.
Ventilation: a fully sealed room without HVAC requires passive ventilation through waveguide panels. Size them for adequate air exchange (ASHRAE recommends minimum 0.35 air changes per hour for occupied spaces) but specify cutoff frequencies well above your target protection range. This is solvable — it just requires planning before the drywall goes up.
Testing, Validation, and Knowing When You're Done
A built cage that hasn't been tested is an assumption. I've measured DIY Faraday rooms that tested at only 15–20 dB attenuation despite appearing well-constructed — because of a single unshielded conduit run through the floor. Field testing catches these failures before an event does.

Basic field test method: place a calibrated RF signal source (a cheap SDR transmitter or a known-output WiFi router) inside the shielded space. Measure exterior field strength with a broadband EMF meter (Trifield TF2 works for basic validation; for higher-frequency testing, use an SDR receiver like RTL-SDR with a known antenna factor). Compare inside-versus-outside readings. A well-built Tier 2 room should show 40–60 dB attenuation across the 100 MHz–2 GHz range. Perfect attenuation isn't the target — 85%+ at operationally relevant frequencies is sufficient for E1 EMP protection of stored equipment.
Red flags that indicate professional help is warranted: attenuation below 20 dB despite apparent seam integrity (suggests a hidden penetration or grounding failure), visible corrosion on copper bonding points within 12 months of installation (grounding system issue), or readings that vary significantly by wall section (inconsistent mesh contact). Professional RF shielding verification using calibrated equipment per IEEE 299 is available from companies like ETS-Lindgren and Compliance Testing LLC — expect $500–$1,500 for a residential assessment.
Integration — Where Faraday Shielding Fits in the Full Prep Stack
A shielded room is one layer. It protects the assets you store inside it at the moment of the event. It does nothing for the electronics already plugged into your home's wiring, the vehicle in your driveway, the grid infrastructure supplying your neighborhood, or your communications plan if you haven't pre-positioned the right gear inside. Faraday shielding integrates with — and depends on — a broader EMP preparedness architecture that includes EMP-hardened communications planning, generator and backup power sizing, and vehicle-level EMP hardening.
Prioritize what goes inside the cage. A suggested protected inventory for a Tier 1 or Tier 2 build: one or two handheld ham radios (Yaesu FT-60R or equivalent, programmed before storage), spare alkaline and lithium batteries sufficient for 30-day radio operations, a backup smartphone with offline maps and reference documents loaded, a small solar charge controller (20–40A MPPT type), and critical documentation in printed form. Store devices powered off, disconnected from any cables, and ideally inside a secondary inner bag for layered protection.
Post-event access is a real operational constraint most guides ignore. A sealed Faraday room with a proper knife-edge door seal is not a door you open and close casually — every entry and exit is a disruption to the shielding integrity and a potential failure point over repeated cycles. Design your cage around realistic access frequency. If you need daily access to stored comms gear, a robust Tier 1 cabinet inside an unsealed room is more operationally sound than a Tier 2 room you have to re-seal every time you retrieve a battery.
Annual maintenance: inspect all copper bonding connections for corrosion (especially ground rod connections below grade), test attenuation with the same RF source and meter you used initially, and re-seal any cracked conductive tape at seams. This is a one-hour annual task that determines whether your cage still performs or has become a decorative metal room.
Your Shielding Decision Tree — Start Here
Walk through these four questions before spending anything:
- What is your primary threat model? Nuclear EMP or severe solar storm requires genuine EMP-grade hardening with grounding. EMF health concerns require lower-spec shielding with more attention to livability. Both? Build to the higher EMP standard.
- Are you protecting equipment or living space? Equipment-only: Tier 1 ($40–$300) solves the problem for most households. Living space: Tier 2 ($800–$4,000 DIY) is the practical ceiling for residential builds.
- What is your realistic budget and timeline? A $200 well-built ammo can cage protecting your radio and batteries this month beats a $4,000 room build that starts next year. Tier 1 now, Tier 2 later, is a valid strategy.
- Do you have the skill to verify your work? If you can't test attenuation after building, either learn the method (SDR + broadband meter, covered above) or budget for a professional assessment. An untested cage is a hypothesis.
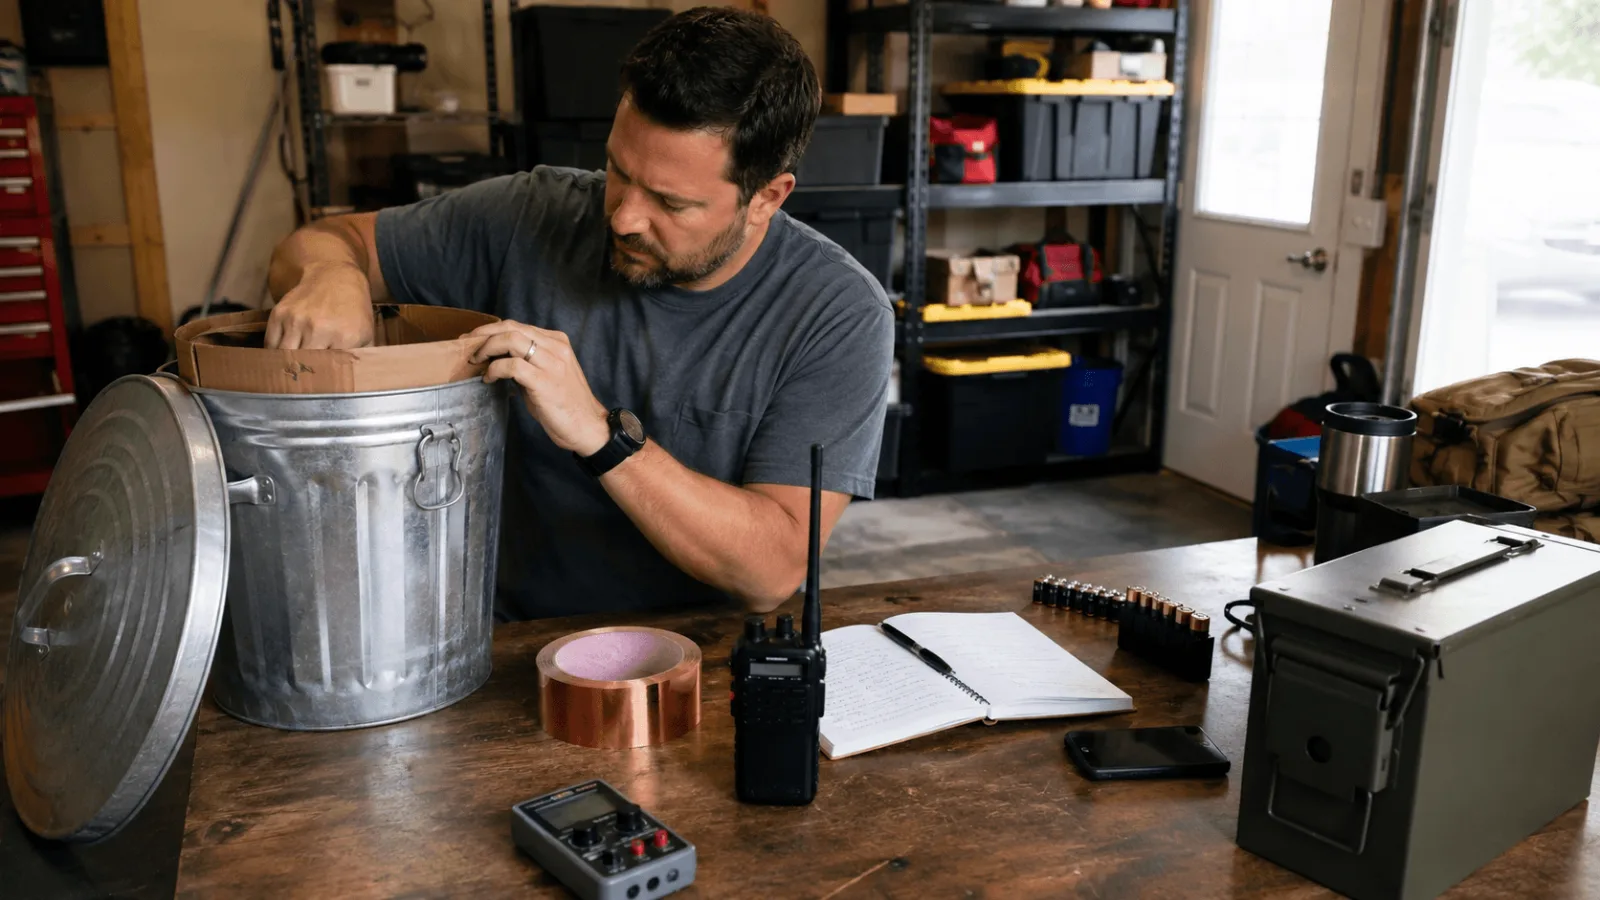
The quick-win action for this month: source a quality galvanized steel trash can with a tight-fitting lid, seal the lid seam with copper conductive tape, line the interior with a layer of cardboard to prevent direct metal contact with devices, and store your most critical comms gear inside it — powered off, cables disconnected. Measure the attenuation with a basic RF meter if you have one. That is a functional Tier 1 Faraday cage for under $60, and it protects your most critical electronics against E1 right now while you plan anything larger.
The prepared household doesn't need a metal room to sleep in. It needs the right equipment protected, in the right enclosure, with verified attenuation and a real ground path to earth. Everything else is scale.